April 7, 2020
About the Author: Sonja Joubert
Do you want to learn to play the piano as an adult? Starting with healthy training and a healthy technique is essential.
Maybe as a child, you always wanted to play the piano, always saw the instrument, were intrigued by it, but never had the opportunity. There is never a better time to start than right now! It’s never too late. Many adults have succeeded to learn to play their favourite pieces after beginning to train only in their adult years. It’s truly a great blessing and can be very relaxing and motivating, bringing new avenues to your life and achievements to maybe, a bored adult. It’s never too late to start, regardless of your age! Even for the adult being advanced in age, learning to play the piano can be of great pleasure and comfort!
Learn to play with a good pianist or teacher.
I do suggest that you start with proper training at a good music institute and, or with an excellent well-trained pianist, who can motivate, guide, and help you develop quickly and with vision. It’s imperative to learn the basics and have a healthy start with a healthy technique and theory. Having proper training will make the learning curve faster and be a pleasure.
In this article I want to concentrate on the basic healthy technique to start with, as well as using basic chord structures to get you playing, as well as the reading of music.
“Technique is such a broad term— thousands of pianists with different physical approaches to the instrument play well and (hopefully!) without injuries. But often when we discuss injury-free techniques, we are talking about advanced pianists playing extremely demanding repertoire. Very few of us, however, will ever teach students at this level —a great many of us routinely teach the “regular kids” in our home studios. How does all of this information on technique relate to teachers of average Janes and Joes? A great deal, actually. The best method is one that has intelligent, careful uses of the body at its very foundation. “Healthy technique for beginning students” by Rebecca Grooms Johnson, Ph.D., NCTM.
Posture and Hand position.
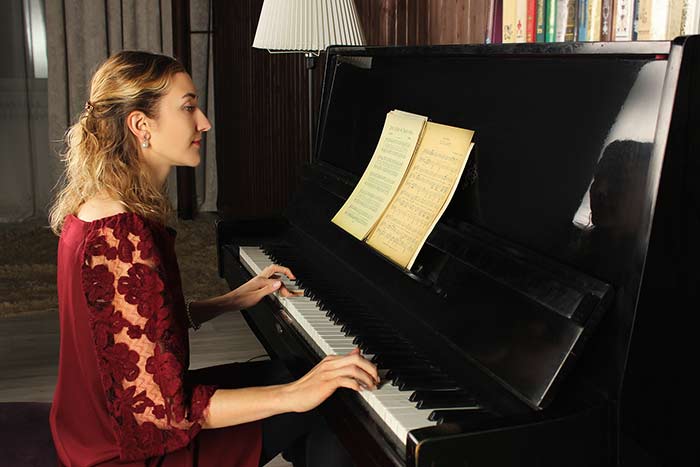
As I have mentioned in a previous article, seating in front of your piano or electrical/digital piano is essential. There are different ideas around the correct seating or posture, but the main thing is to be comfortable and sit at a right height so that you do not feel as though you are playing down onto the piano or trying to reach up from the bottom. Sit comfortably on the seat with your hands on the keys. The curving of your hand should be a slightly curved finger position and not a tensed bent finger position. It’s rather like holding a pencil between your first two fingers and the thumb. It will form a natural curve. Place all 5 fingers on the keys. The wrist should not hang down or stand up in the air. The forearm, wrist and hand form rather a straight line from the elbows. One can say that the arms are a bit like floating. Some teachers use a ruler that they place on the front arm and hand, letting the student see that the arm, hand and wrist touch the whole ruler when hands are placed on the keys. It does not mean that there is no movement. Having graceful movements of the arm and wrist plays a critical role in tone production, but the main position of the arm, hand and wrist is in a straight line.
The Natural Curving of the Hand.
To train the student how to feel the keys with the fingers, I often let the student place the hand with the curved but relaxed fingers on a table in front of them. With the fingertips, or the soft part of the fingers, feel the table surface by moving the finger upward and then downwards, but a bit of a stroking manner. Not in the hitting or hammer way, as the sound produced this way will not be as beautiful. You can practise your fingers moving each one up and down with this gentle stroking down movement. This way, you can practise your finger muscles to get used to playing the notes on your piano.
Playing portamento or single notes.
An excellent way to start playing single loose notes (portamento or non-legato playing) on the piano, is to use one finger, the middle finger, lift the hand nearly in a hanging fashion with a relaxed wrist and let it sink into the keys, with the wrist going down a bit and then up again, leaving the keys. Use this in single-note playing. A down up movement in which the arm stays relaxed and the wrist moves down and up rather than the finger.
Movements of the wrists.
It’s important to know that there are a lot of movements involved in playing.
- There is a rolling movement of the wrist where you can start to loosen up your wrist by moving the hands in a circular way.
- Then moving the hand up and downward like waving.
- Moving your hand sidewards from the wrist is also a good exercise for relaxing the hands and technique development.
It’s vital to try to be as relaxed as possible in playing the piano and never to have strained fingers of stiff fingers and wrists. Sitting up straight helps as well. You do want the fingers to be strong, to develop and move, but having relaxed wrists plays a significant role in good sound and technique. Here are some tips in a nutshell by John Bloomfield for your basic training as an adult student:
John’s 5 Tips for Teaching Technique:
● Get the seat height right.
● Ensure there is an unbroken connection between the arm and the hand (ie. wrist neutral)
● Avoid stretching the fingers out.
● Avoid over-curling the fingers.
● Avoid lateral twisting of the wrists while playing (ie. keep the forearm and wrist in alignment)”
(From: Top music – By John Bloomfield – Golandsky Institute NYC)
Now let’s start playing!
Starting to play with your 5 fingers:
In piano playing, you number the fingers of your hand as follows: Your thumbs are nr. 1, then the index fingers are nr. 2 and so it continues up to your pinkie which is nr 5. Most piano teachers start training their students from the well-known middle C. A few basics for the beginner student is to know the layout of the keyboard, which is quite obvious. There are white notes and black notes in groups of twos and threes. The first seven notes of the alphabet are used for the notes on the piano, starting with A up to G, then repeating it over and over.
The C major Scale:
The easiest key, according to most piano teachers to learn is the so-called C major scale. It is, however, not the easiest to play but for the sake of having no black notes involved, it is the easiest. The C major scale starts on the C note and moves up with eight consecutive notes.
Starting on the C note, one will play the C then D, E, F, G, A, B and end again on the C. We call this playing a scale for an octave. Playing from the one C up to the next. “Octa” as in being the Latin word for eight notes. Like an octopus!
Playing this scale will involve specific fingering and a movement of the thumb under one’s hand to play all eight notes legato (that is playing smoothly in sound, and not with loose sounds). It’s always a great thrill for the young student, and also for the beginner adult to be able to play their first scale!
The C Major scale, here is how its done:
Place your right-hand thumb on the middle C note. Play the first three notes using fingers 1, 2 and 3. After the 3rd finger has played, the thumb needs to move under the hand and be placed on the F note, then the whole hand moves up and forms the five finger setting again. Play all the next consecutive notes. You will see that this will lead your fingers up automatically to the top C note with your pinkie ending on that C. Play up to this top C note and then back again to the thumb on the F note. Once again the thumb will be under, but now the hand has to move over the thumb with the 3rd finger to play the E note, then the 2nd finger plays the D note, and it ends again with the thumb on middle C. Well done! That was the C major scale!
Legato playing:
Scales are normally played legato – that is in a walking manner. I usually explain this legato with walking. When one foot is on the ground, the other is picked up and moves forward, and when the next one is put down to walk, the other foot is lifted. Legato is like notes walking on the piano, creating a smooth sound. As soon as one finger plays the key, the other is released, and a smooth continuous sound is created. There are no breaks in the sound, and it’s like creating a smooth singing line but with playing notes on the piano. Think of a line that is being sung. Playing legato will soon become natural. At first, you might find it a bit difficult, but after some time, it becomes like breathing or walking.
Playing the first 5 notes with 5 fingers:
Let’s look at playing the first five notes with the five fingers of each hand starting on the middle C.
Place your right hand gently on the keys with the right-hand thumb on the middle C. The index finger will be on D, the middle finger on E, the ring finger on F and the pinky on G. Let each finger gently rest on the notes or keys. Now you can start to play each note by lifting a finger and pressing the key down. Your first sounds of piano playing on the piano. Do the same with the left hand, but starting with the thumb on middle C and the rest of the fingers moving naturally downwards.
Learning to play basic chords and improvisation:
In your first lesson, it could be great fun for the teacher to teach you a few basic chords to play, which will help you feel that you are mastering the piano and developing faster on the instrument, and indeed it is so.
A chord consists of more than one note played simultaneously. We will be doing the basic triad, which is a chord of three notes that are played together. When we mention notes here, I mean the keys on your piano.
The C Chord:
Place your thumb on the C note (or key), skip a note, then play the E note with your 3rd finger, skip one key again and play the next key which is the G note, with your pinkie. This way you will press down three keys together – the C, E and G keys with fingers 1, 3 and 5 in the right hand, forming the well known C major chord. Well done! You have learnt your first chord.
Playing the three notes together will also help you with your hand position. You can also find more C chords all over the piano – as the C note is the first key on the left just before the black two key group. It means that at each two black key group, you can build another C chord. This way, you can already move or play all over the whole keyboard with a single chord. (The chord can also be played with the left hand starting with the pinkie then the 3rd finger and lastly the thumb. The mirror image of the right hand.)
Add the C bass note:
You can also add a bass note with your left hand by playing a C note on the keyboard towards the left side or lower sounding area on the piano. Play a low sounding C note with the left and the new C chord with your right hand. This can be played in any rhythm or whatever way you feel. This training is good for creative playing and improvisation, giving you freedom on the piano.
Note reading and basic theory:
Essential step is to immediately start to learn notes and score reading for the instrument. I suggest that you use children’s books, if you do not find it offensive. There are good adult books around but I do find that just using children’s books and moving through them within a concise period works better. The work is set out very easily and moves slowly, making sure that the child conquers each note, or time signature or theory part needed for playing music from the score. Note reading includes having a clear understanding of the symbols on the stave (the stave is the five lines used for music notation) and then transferring it to the piano by playing it with the fingers. Your teacher will be able to help you and guide you. I think working through a children’s book within a week or two, or depending on the time you have to work on it, is better than trying to develop faster with some books that have too much “adulty” information. It can actually slow the learning process down. Better to do it simply and correctly at first, than to try and skip the basic notes and basic theory of notes, note values, keys etc. You might feel a bit awkward playing Mary had a little lamb, but I assure you it’s only for a very short time, until you will be able to play Beethoven’s “Fur Elize” or an easy Mozart or whichever music you have in mind.
Enroll for exams!
Do ask your teacher to enroll you for an external exam like the exams of Trinity College of Music London, or the ABRSM (Royal Schools of music). There is an initial exam before Grade 1, and doing an exam will motivate you and help you move forward in a much quicker way than otherwise.
The Enjoyment of learning to play the piano!
Playing the piano can be one of the most thrilling experiences ever, especially when you start to feel and experience the pleasure of interpreting your music and getting lost in just playing and enjoying your music piece. Of course, like all things, it might take time to get to this point, but please be very patient and do not give up!. Give yourself at least a year of patiently going to every lesson. You will be surprised at how far you have come after a time. Do not give up when you feel you have no time to practise! Just go to the lesson and enjoy it. You are paying for it, so it doesn’t matter if it’s not perfect! It’s about learning a new skill and enjoying it. Please do not be perfectionistic about your playing. Rather be creative! Creating sounds, creating moods and creating music. Enjoy!

RELATED POSTS